We recently performed an upgrade of the Oracle Business Intelligence Applications (OBIA) version to v7.9.6.3. These are the steps we went through
Steps for upgrading OBIEE 10g to 11g on Windows 2008 R2 server
Upgrading BI repository and catalog
1) Login into system where the OBIEE 10g RPD and Webcatalog are installed.
2) Take a backup of the existing RPD and Webcatalog
3) Copy the files to the machine where OBIEE and/or OBIA 11g is installed.
In order to upgrade the repository and presentation catalog, go through the following steps using the Upgrade Assistant.
4) Please note that the WebLogic Administration Server and the Managed Server in the 11g environment must remain running during the upgrade process.
5) Navigate to the ORACLE_HOME\bin directory of the Oracle Fusion Middleware installation. In this example, the directory path is D:\bi\Oracle_BI1\bin.

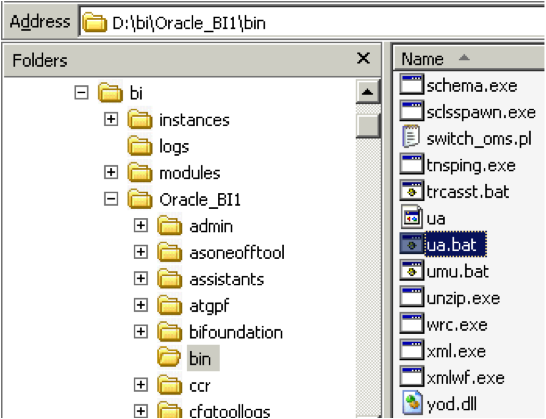
6) Double-click ua.bat to open Upgrade Assistant in the graphical user interface mode. This tutorial describes how to use Upgrade Assistant in the graphical user interface mode. You can also use the Upgrade Assistant command line to perform these tasks.
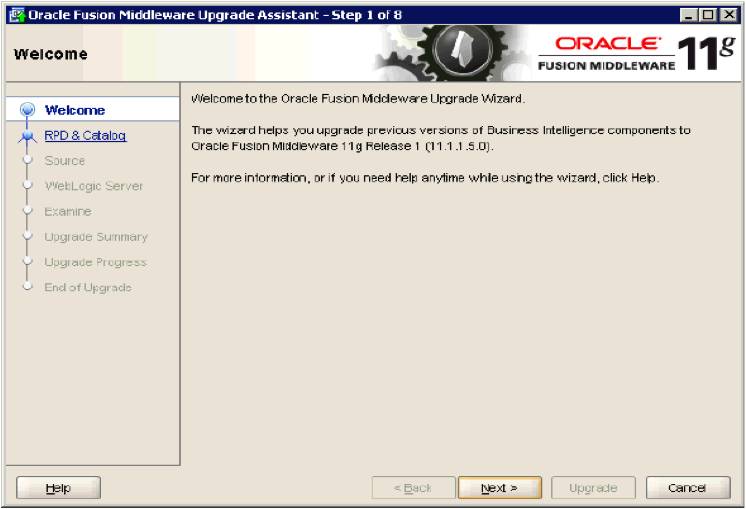 7) Click on Next button
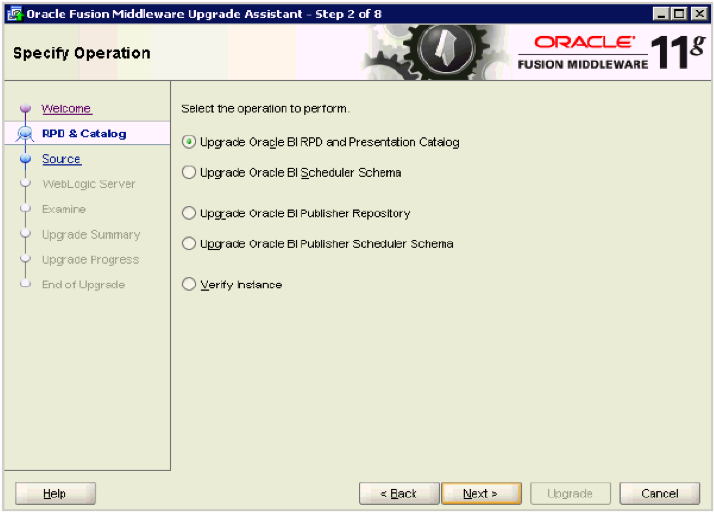 8) On the “Specify Operation” screen, select Upgrade Oracle BI RPD and Presentation Catalog and click Next
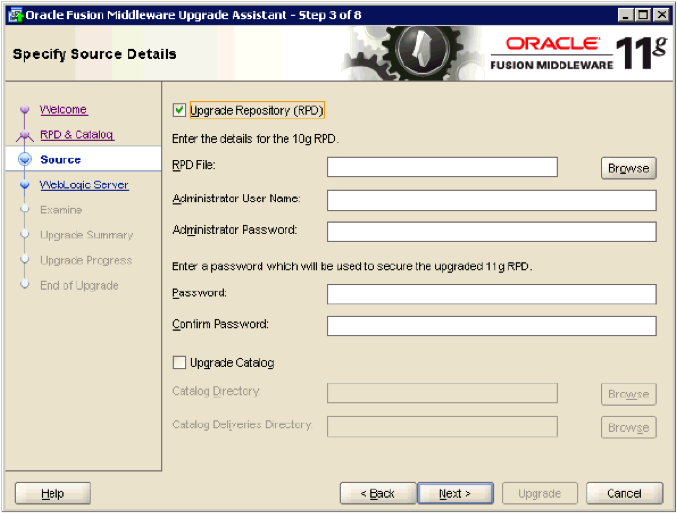
9) On the “Specify Source Details” screen, select Upgrade Repository (RPD). Click Browse next to the RPD File field.
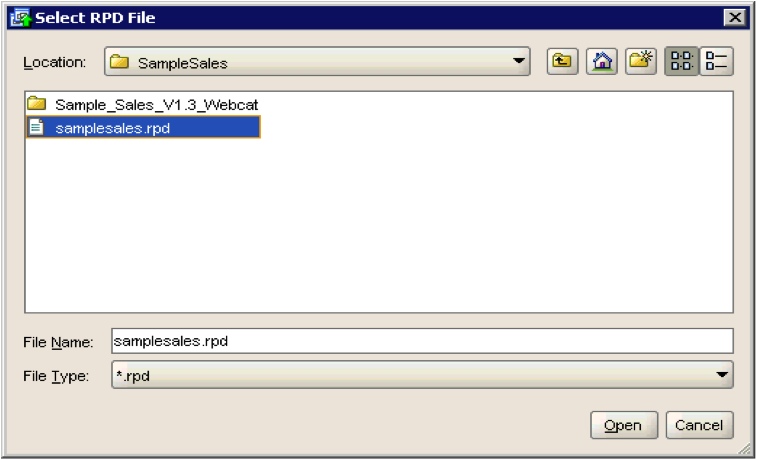
10) Browse to the location of the 10g version of the repository and click Open.
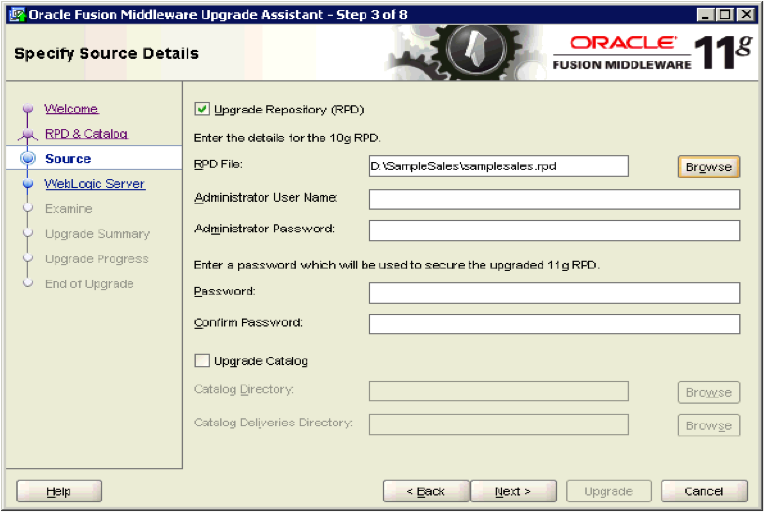
11) The path to samplesales.rpd is added to the RPD File field.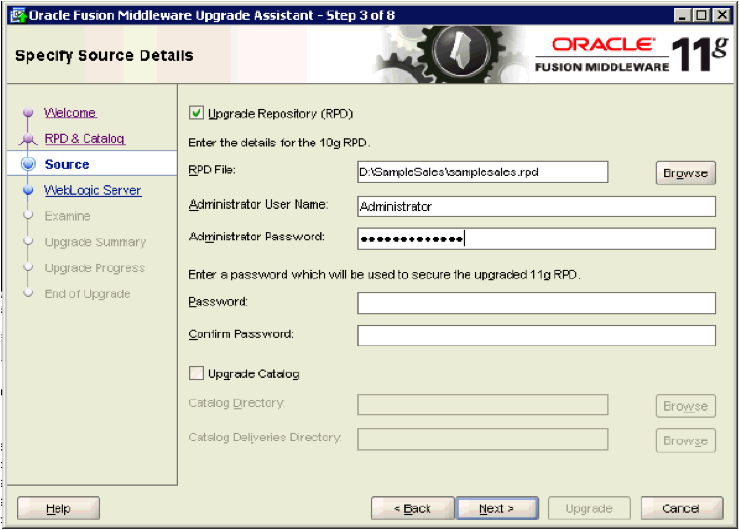
12) Enter the Administrator User Name and Administrator Password for the 10g samplesales repository.
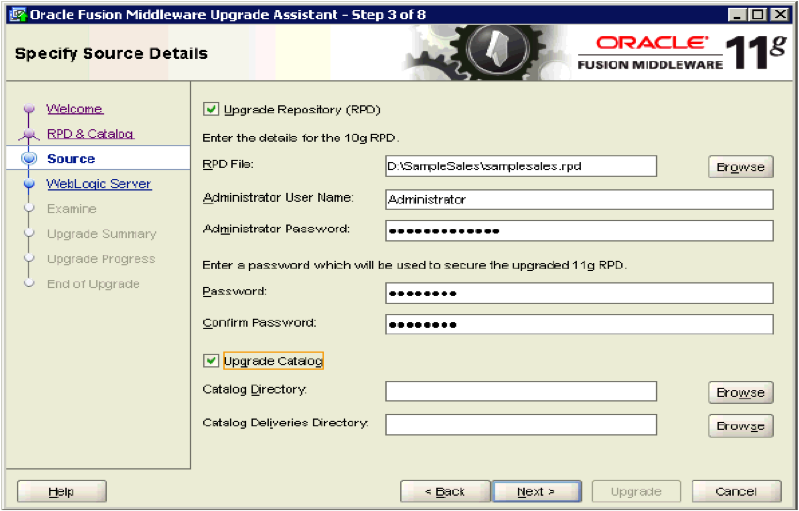
13) Select Upgrade Catalog. Click Browse next to the Catalog Directory field.

14) Browse to the location of the 10g version of the Sample Sales presentation catalog and click Open.
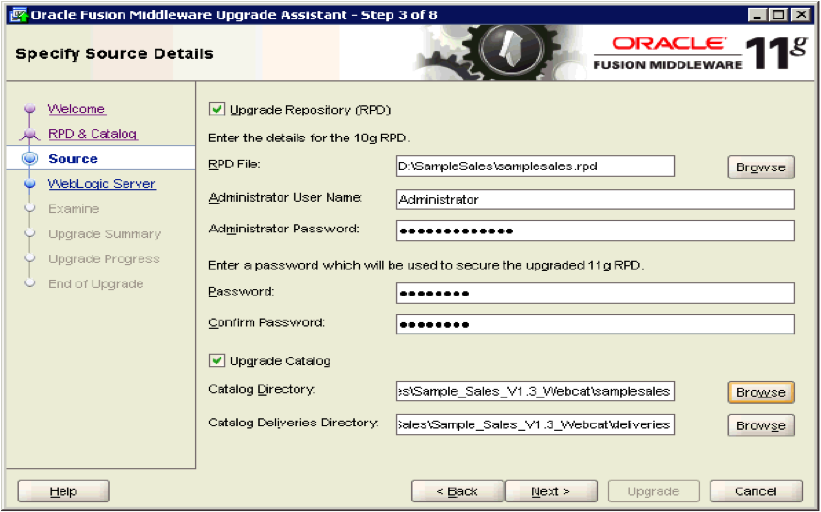
15) The path to the Sample Sales presentation catalog is added to the Catalog Directory field. The path to the deliveries directory is automatically added to the Catalog Deliveries Directory field.
Click Next to continue.
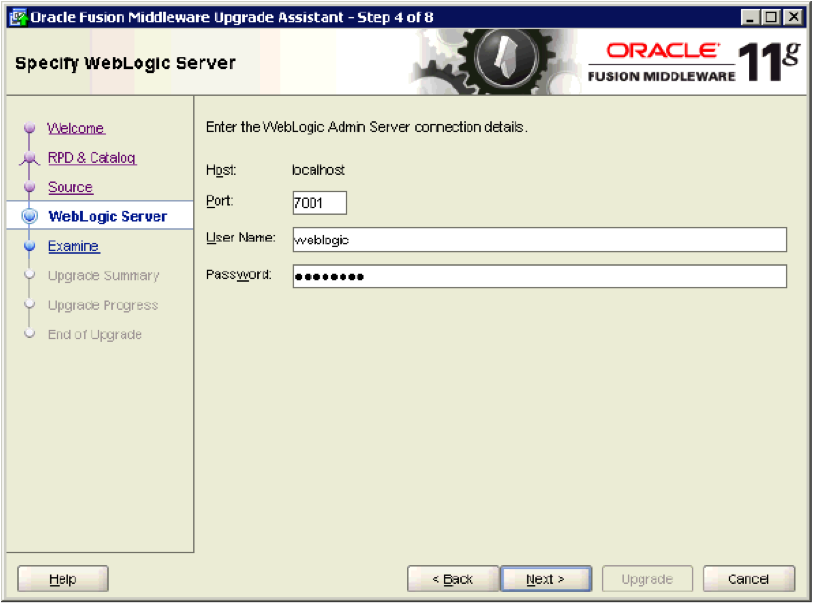
16) On the “Specify WebLogic Server” screen, enter the WebLogic Admin Server port number. Typically the port number is 7001.
17) Enter the username and password for the WebLogic Admin Server. Click Next to continue 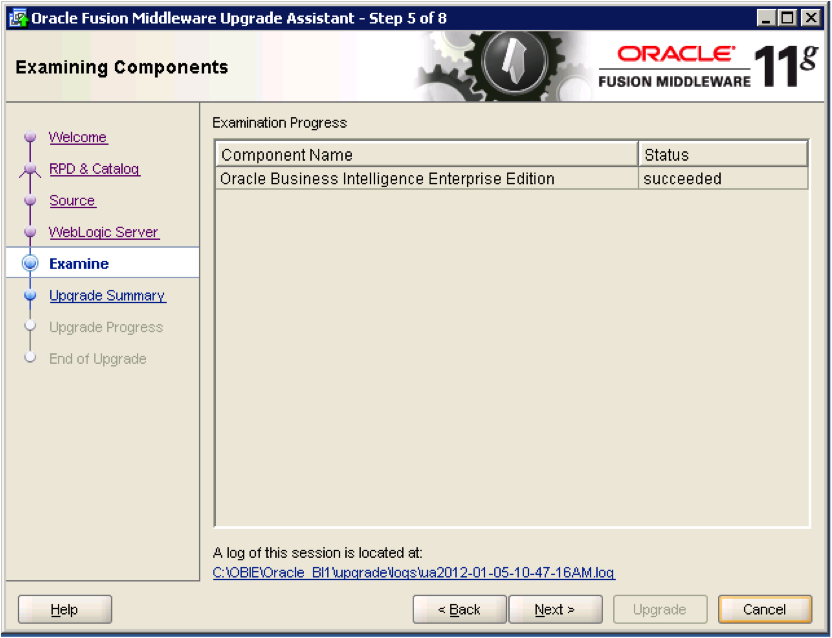
18) On the “Examining Components” screen, wait until you see a succeeded message. During the examination process, Upgrade Assistant checks whether the source directory exists, the source directory is readable, and contains a file for upgrade.
Click Next to continue.
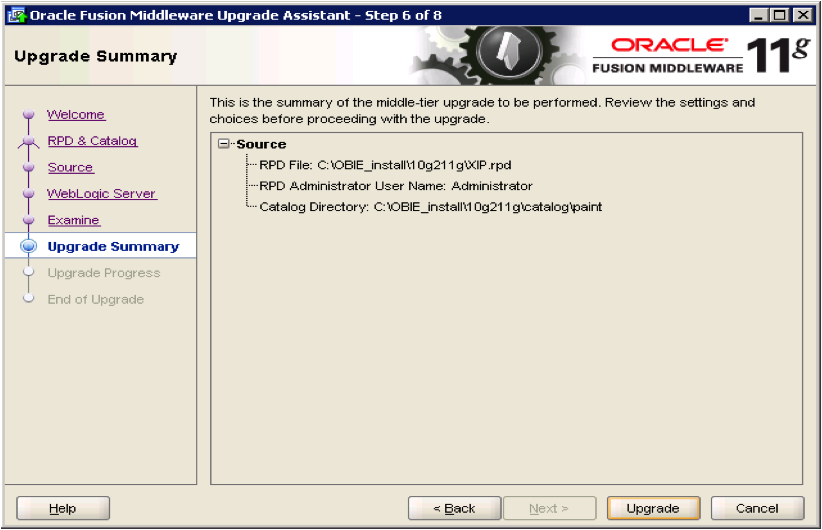
19) On the “Upgrade Summary” screen, review the summary of the upgrade to be performed.
Click Upgrade to start the upgrade process.
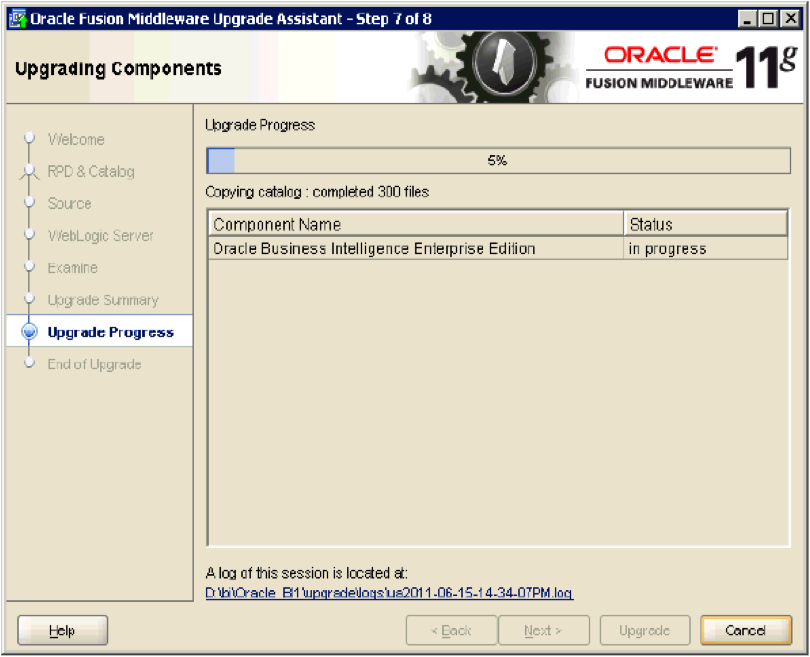
20) On the “Upgrading Components” screen, you can view the upgrade progress. BI components are stopped and restarted. The Sample Sales presentation catalog and repository are loaded.
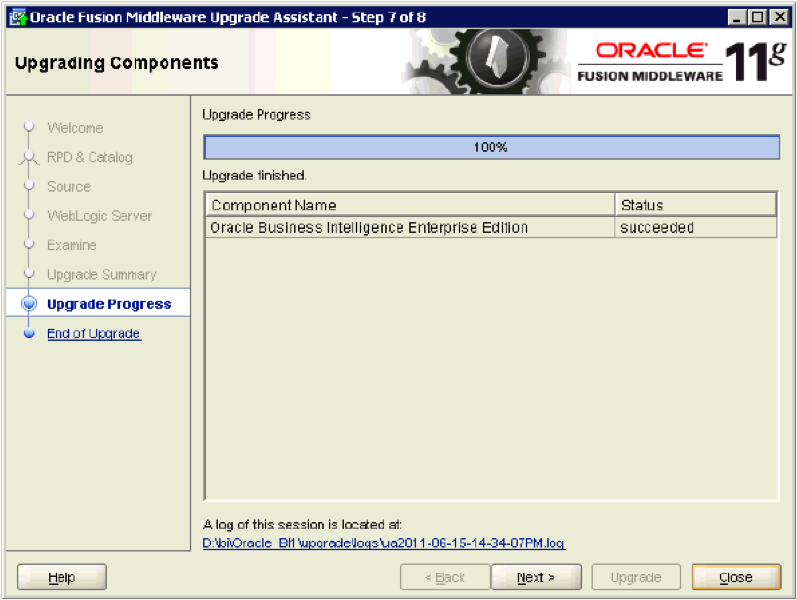
21) When the upgrade completes the status changes to succeeded. If there are errors during the upgrade, inspect the log files for details. The log files are located in
\upgrade\logs\ua.log where is the current date and time. You can also check the component log files in directories organized by component under \diagnostics\logs.
Click Next to continue.
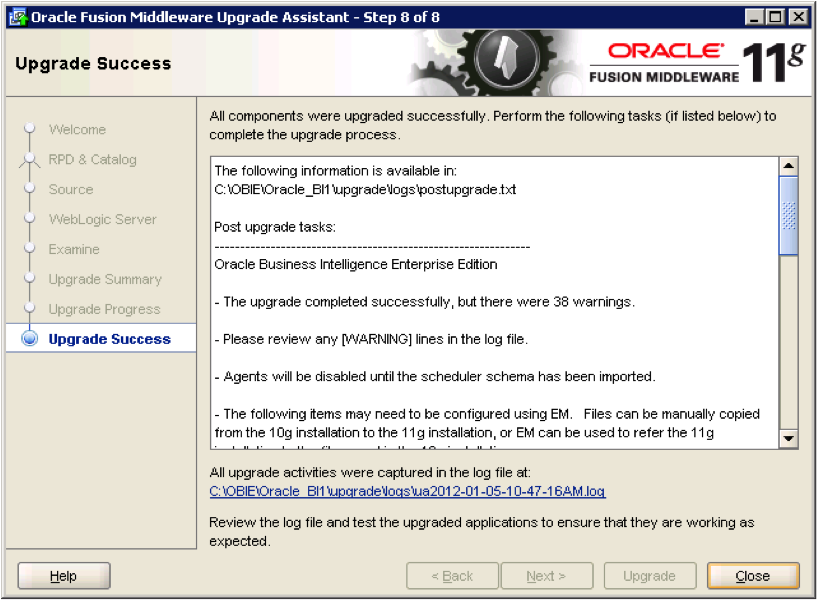
22) On the “Upgrade Success” screen, review information related to the upgrade task and click Close.
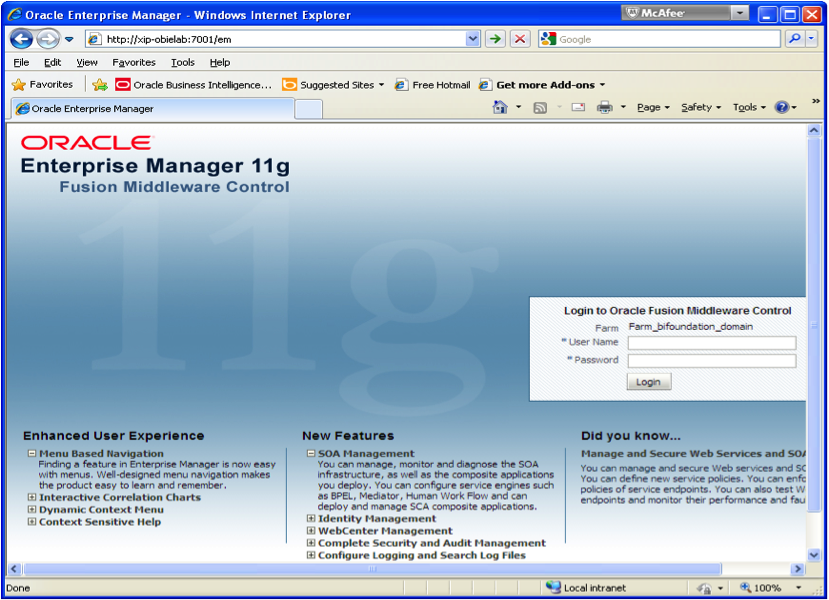
23) Verifying the upgrade process
The Upgrade Assistant automatically loads the new repository to the 11g BI Server and restarts all BI components. You can verify that Oracle BI EE has been upgraded successfully by logging into the 11g system to confirm that Oracle BI EE components are running, checking repository metadata, and verifying that you are able to view dashboards and reports. To verify the upgrade, perform the following steps.
24) In a browser, enter https://localhost:7001/em to log into Fusion Middleware Control on the 11g system.
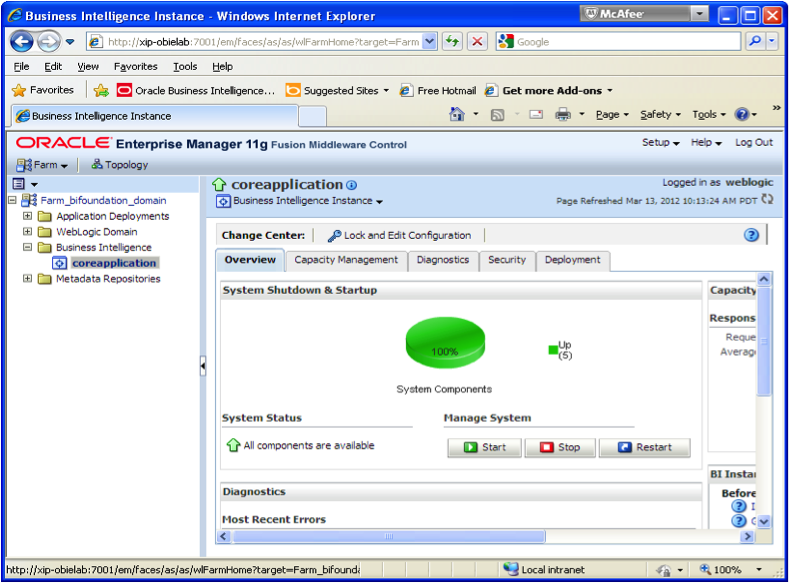
25) In the left pane, expand Business Intelligence > coreapplication. In the right pane, select the Overview page and confirm that all system components are available. Select the Deployment page.
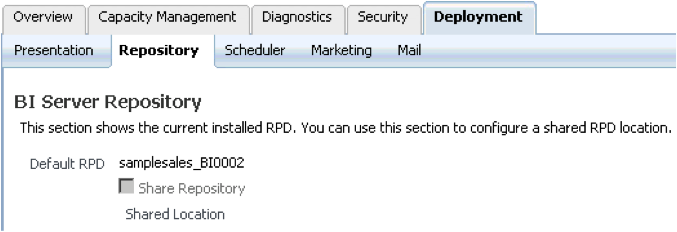
26) Select the Repository subtab. This page shows the current installed repository. Notice that the Upgrade Assistance automatically uploaded the upgraded repository to the BI Server domain. In this example, the repository is named as samplesales_BI0002.
Verifying Metadata
27) Select Start > Programs > Oracle Business Intelligence > BI Administration to open the Administration Tool.
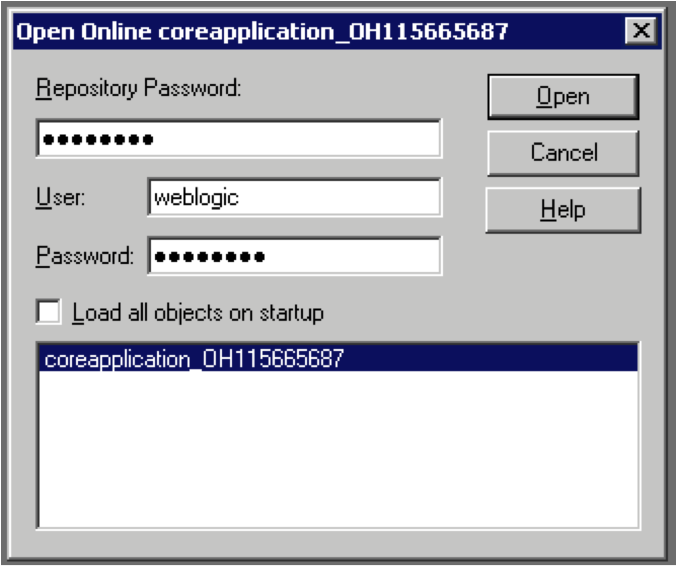
28) Select File > Open > Online to open the repository in online mode.
29) Enter the repository password and user password. The repository password is the password that you identified earlier during the upgrade process: welcome1. The username and password are the Oracle WebLogic Server administration username and password created during your 11g installation. In this example, the user is weblogic.
30) Verifying Reports and Dashboards:
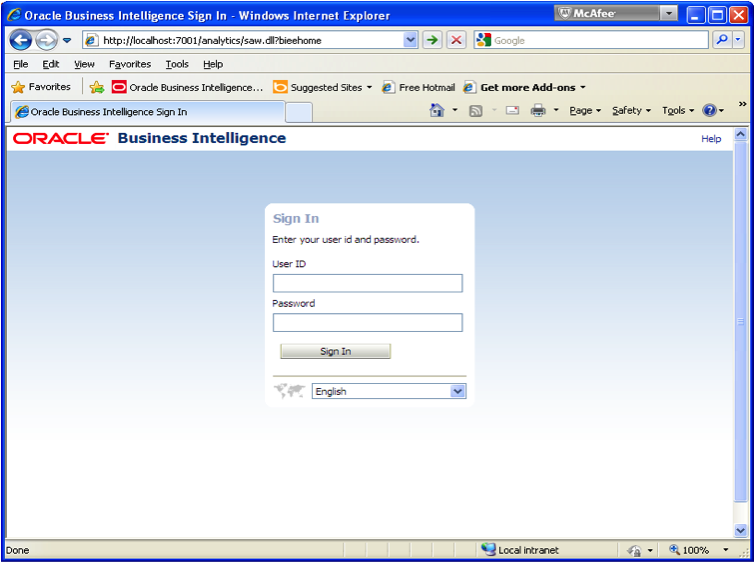
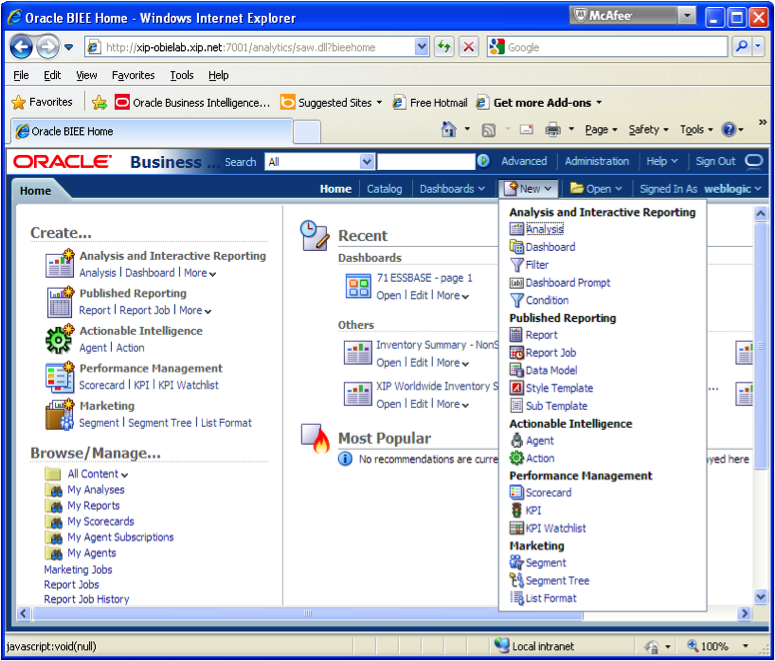
31) In a browser, enter https://localhost:7001/analytics/saw.dll?bieehome to log into OBIEE 11g
Note: localhost=BI Server Name
32) Sign in to Oracle BI 11g as an administrative user. In this example the user is weblogic. Your username and password will vary depending on how you have installed and configured your environment